I have a really great treat for you all tonight! I am at Market in Atlanta today and tomorrow so I have asked my good friend Sarah Cook to guest blog. Sarah is the one who taught me all of my photography knowledge. She showed me how to use my camera and how to capture a still image. My pictures improved 200% after one lesson with her. If you are local, she is a fantastic family and special needs photographer. I hope your enjoy her 4 photography tips and check out her blog. Her link is at the bottom of this post! Don't forget about our party on November 17th!! I have a GREAT giveaway I can't wait to share with all of you!!
So here ya go! Mrs. Sarah Cook..........
1)Find "good" light.
Before I became a Photographer, I thought I needed to have my subjects in the sunlight. I had good reason - I was trying to avoid my flash b/c on-camera flash is BAAAAD, okay? A year and a half into my professional career as a photographer, I know that putting my subject where they are facing the sun is not a good idea - you end up catching alot of harsh shadows and too much difference between bright and dark on your subject. SO, find the shade - but not too much shade - just "outside" of the light of the sun.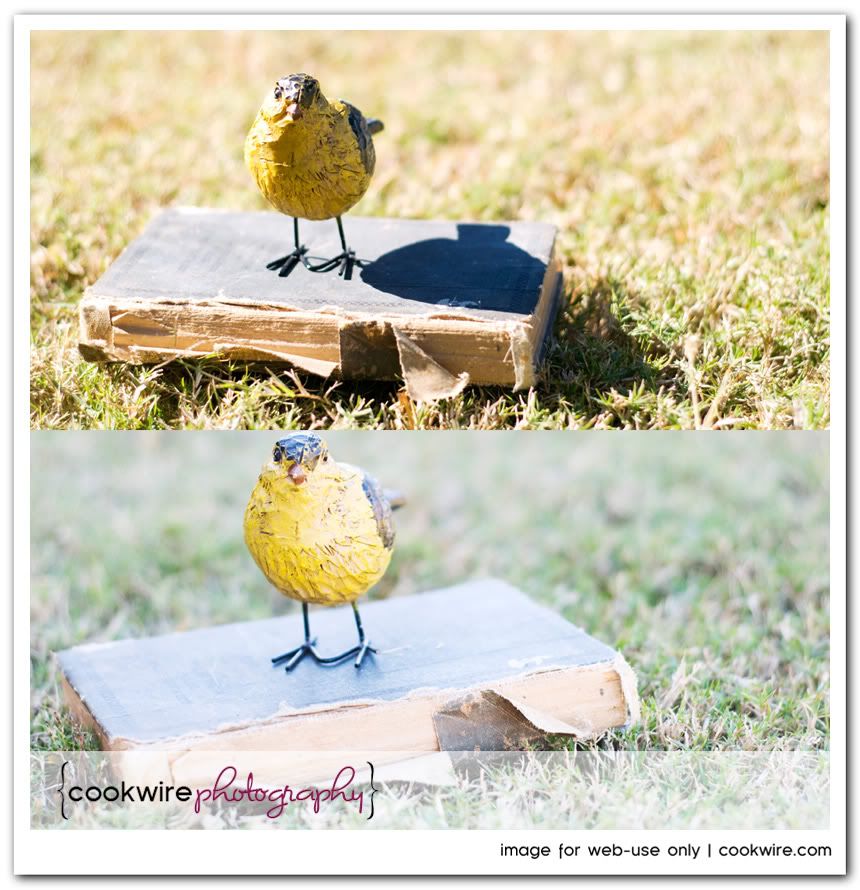
2)Get down at your subject's level.
Squat, lay, sit on the ground. When you take a picture of an item/subject from above it appears distorted - makes it difficult to really understand the size and scale of an item/subject.
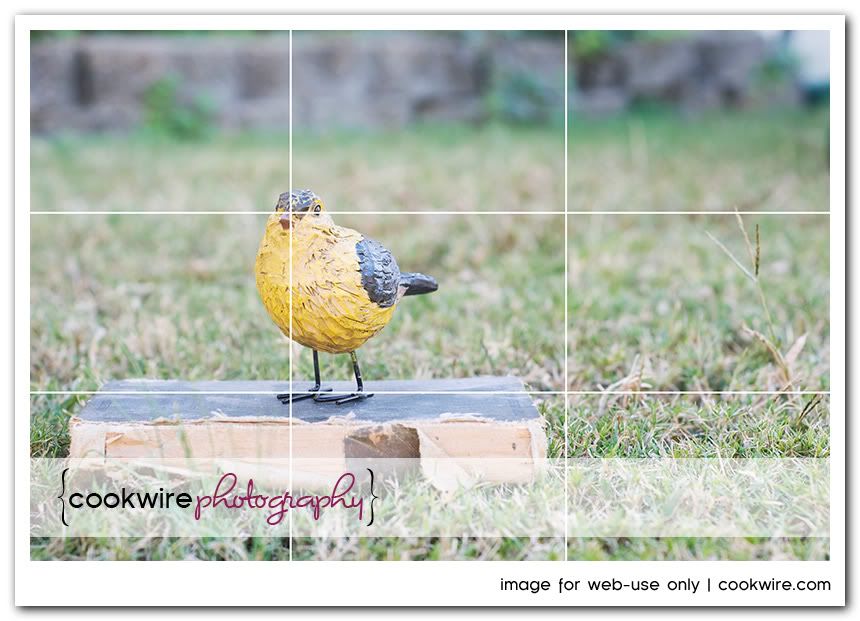
3)Use the Rule of Thirds.
According to Wikipedia,- "The rule of thirds is a compositional rule of thumb in visual arts such as painting, photography and design.[1] The rule states that an image should be imagined as divided into nine equal parts by two equally-spaced horizontal lines and two equally-spaced vertical lines, and that important compositional elements should be placed along these lines or their intersections.[2] Proponents of the technique claim that aligning a subject with these points creates more tension, energy and interest in the composition than simply centering the subject would."
4)Use a large aperture.
Large Aperture = small #, like 1.8. When photographing details of an item, like an inscription, an interesting handle, a great texture use a large aperture. It not only lets in more light, but it makes that detail appear sharper. It's also artsy ;-)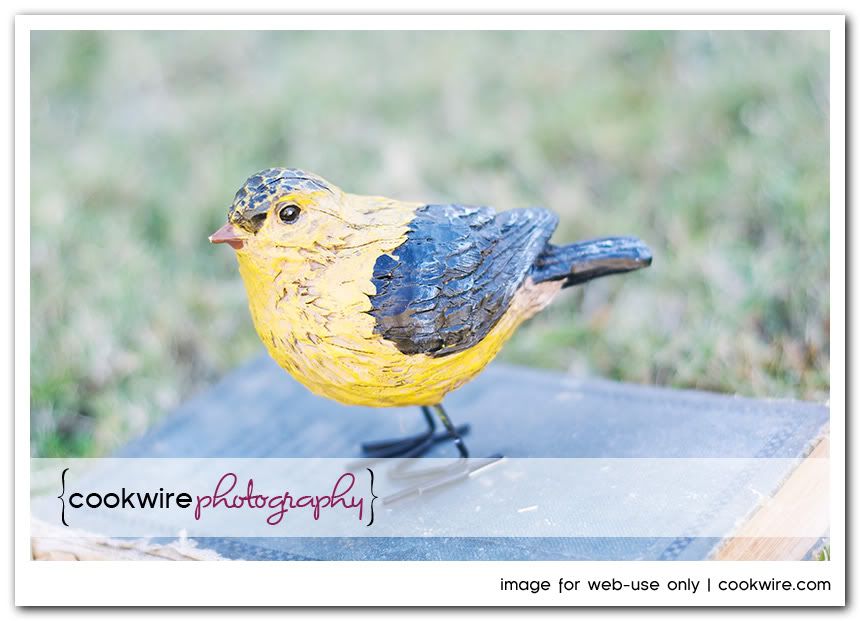
Sarah Cook, of Cookwire Photography is a Photographer in the Birmingham area specializing in Family, Children and Special Needs Photography
Fabulous tips!! Thanks for sharing!
ReplyDeleteValuable lessons here, now I will need to experiment!
ReplyDeleteHey, thanks so much!!! What ever you do, do not peek at my pics, they're pretty lame. haha, but...I have been trying hard to capture just the right angles and lighting is a real challenge especially when photographing in my poorly lit home. I appreciate the tips a great deal, I have been trying to get on the same level as my subject and other angles as well. Have a great week, tami from the high street cottage
ReplyDeleteHey High Street Cottage,
ReplyDeleteJust go outside with your items when possible or get near an open window. Natural light is so much better than on-camera flash or other in-home lighting.
Thanks for sharing your tips! Any suggestions for which cameras to step up to from the basic point and shoot I am using now would be greatly appreciated!! Thank you! Cathy
ReplyDeleteNikon and Canon's both make excellent lower-end (AKA, affordable camera's). My biggest advice as far as camera's go is to buy a camera body by itself and a 50mm 1.8 lens - as opposed to getting a kit.
ReplyDeleteA 50mm 1.8 lens is a great, sharp, inexpensive lens. The downside is that it doesn't zoom, but you really can't beat the sharpness of the picture it produces. It also lets in alot of light - allowing you to photograph your items indoors (with light coming through the window/door) w/o flash.
ReplyDeleteThank you! Taking pictures of embroidery can be difficult to get nice clear photos that highlight the embroidery, as well as what it is on.
ReplyDeleteDear Santa....
That was a great lesson. Thanks so much. Any tips for adding light inside when you can't move something near the window?
ReplyDeleteAnita,
ReplyDeleteBring a lamp in the room - maybe one of those that shines up into the ceiling. If you just have a regular lamp, bring it in the room, but not too close. Don't put your object directly under your source of light. You may have to experiment a little with the light placement.
Thanks for the tips Sarah!!
ReplyDeleteHugs
SueAnn
I'm always looking for new tips as I'm experimenting with my photos, hoping to sell them one day. Thanks!
ReplyDeleteHi Kelli, I just found your lovely blog and I have spent some time going through the archives. I love your style and I am now your newest follower! Thanks for the photography tips..I need all the help I can get.
ReplyDeleteHugs, Sherry